
Tamarack: Assembling your Quilted Pieces
Jen Beeman
4 min read
Shop this post

Tamarack Jacket
Sizes
0-18
Regular price
From $18.00 USD
Regular price
Sale price
From $18.00 USD
Unit price
per
Available in
Paper
PDF

Tamarack Jacket
Sizes
14-32
Regular price
From $18.00 USD
Regular price
Sale price
From $18.00 USD
Unit price
per
Available in
Paper
PDF

Tamarack Hood, Collar, & Patch Pocket Add-On
Sizes
0-18, 14-32
Regular price
$12.00 USD
Regular price
Sale price
$12.00 USD
Unit price
per
Available in
PDF

Tamarack Quilting Design Sheets
Regular price
$0.00 USD
Regular price
Sale price
$0.00 USD
Unit price
per
Lets talk about quilting your Tamarack Jacket. For a lot of garment sewers this is going to be the most foreign part of the process unless you have some quilting experience. Fear not, we'll walk you through with ease and soon you'll be wanting to quilt all sorts of things! If you have questions about cutting or any of the supplies used here, please see our previous two posts, Tamarack Supply List and Cutting your Jacket.

To begin, you'll want to create your "quilt sandwich" which is exactly what it sounds like. The two outer layers, in this case the shell and lining, form the bread and the batting becomes the sandwich innards. Align the three layers of fabric so that they're smooth with no bunching or ripples, and so that all edges match up.

Pin around the edges to temporarily secure the jacket layers. Using thread, stitch two small tacks to mark the pocket placement. You don't want to mark these with chalk because it will likely wear off as you quilt your layers.

Next I like to hand baste two anchor lines through the jacket. I use these as another matching point to make sure things are aligned while drawing my final quilting lines. Draw a line with chalk parallel to the front of the jacket about 5-6" in.

Using your basting needle (or whatever needle you have on hand) baste along the chalk line you just drew.
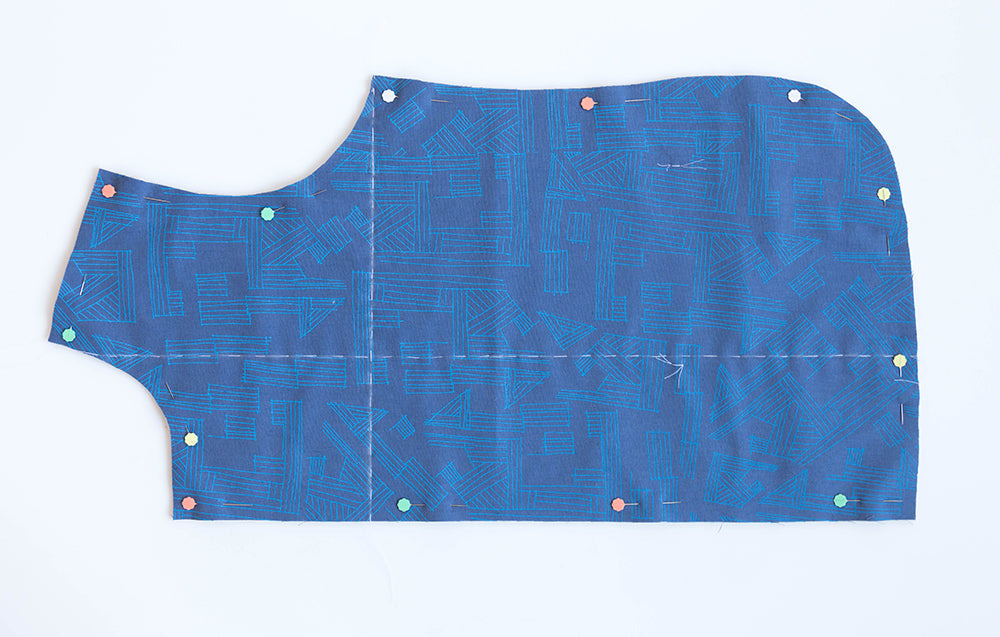
Mark and stitch another line perpendicular to the center front. I like to stitch mine so that it meets the intersection point of the armscye and side seam, that way I can easily make sure my quilting matches from piece to piece.

Now we're all prepped to quilt our Tamarack pieces, but before you dive right in I highly recommend testing out a few different thread colors, stitch lengths, and quilting patterns on a scrap. Make sure you're testing on the same three layers you're making your jacket from as the thickness can affect how the stitching appears. You'd hate to test on a single layer, nail down something you love, then find it doesn't transfer the same way to the layered fabrics. We have a great post where we illustrate a few different quilting designs here. If you're having a hard time deciding how to quilt your jacket definitely check it out!

Once you've got your stitch pattern decided on it's time to mark your pieces and stitch. As when quilting a quilt, you'll want to start in the middle and work outward. I only mark a few lines at a time as the movement of the machine and your hands maneuvering it under the foot can wear away the outer lines if you've drawn them all in right away. Once you draw your lines, use your safety pins to pin baste around the stitching lines. This helps to further ensure the fabric stays where it is as you work. Stitch over the lines you traced using a walking foot if you have one available to you.


Remove the pins and continue the method above for the rest of the pattern piece as shown above.

Stitch around the outer edge of the piece inside the 1/2" seam allowance. I stitched at 1/4" around all edges. This helps to anchor the piece and makes it so that when you're sewing your quilted pieces together to make the jacket you're not dealing with 6 loose layers. Once you've gone around the piece, remove your basting stitches.
Repeat these steps for each pattern piece in the jacket, then you're ready for your welt pockets!

Featured Products:
Tamarack Jacket
Sizes
0-18
Regular price
From $18.00 USD
Regular price
Sale price
From $18.00 USD
Unit price
per
Available in
Paper
PDF
Tamarack Jacket
Sizes
14-32
Regular price
From $18.00 USD
Regular price
Sale price
From $18.00 USD
Unit price
per
Available in
Paper
PDF
Tamarack Hood, Collar, & Patch Pocket Add-On
Sizes
0-18, 14-32
Regular price
$12.00 USD
Regular price
Sale price
$12.00 USD
Unit price
per
Available in
PDF
Tamarack Quilting Design Sheets
Regular price
$0.00 USD
Regular price
Sale price
$0.00 USD
Unit price
per